Yeast Dough for Vatrushki
Tasty, rich, airy, and tender - made for sweet baking. This yeast dough works for vatrushki and filled buns. The pastries stay soft the next day, too. Many home cooks now skip sponge and fresh yeast, but this method allows more rich ingredients, giving a special flavor that’s different from bread dough.
Updated : 26 February, 2026
Easy
About 1 hour.
Ingredients

390 grams
Wheat flour

12 grams
Fresh yeast

1
Eggs

1
Egg yolks

190 milliliters
Milk

60 grams
Butter

70 grams
Sugar

0.25 teaspoon
Salt
Table
Table of volume measurements:
- teaspoon - 5 ml
- dessert spoon - 10 ml
- tablespoon - 20 ml
- glass - 200 ml
Preparation
Step 1
How to make dough for vatrushki? The key to success is having all ingredients at the same room temperature. Take everything out of the refrigerator 30 minutes ahead. Also important: measure ingredients accurately - let’s begin.
Step 2
First, make the sponge (starter). Crumble fresh compressed yeast into a wide, deep bowl so it can rise easily. Add 1 tsp sugar. Pour in half of the warm milk and mix in 1 tsp flour. Take the sugar and flour from the total amount; fill the spoon with a small mound. Warm the milk to 35-38°C (95-100°F): cooler makes it harder for the yeast to activate, hotter can kill it.
Step 3
Stir the mixture into a thin batter and leave it in a warm place for 10-20 minutes, until a foamy cap rises. No need to cover. Always check the yeast expiration date - if no foam appears, the yeast is inactive and must be replaced. I’ll describe how to make the sponge with dry yeast at the bottom of the recipe.
Step 4
While the sponge is rising, sift the flour. Reminder: measure first, then sift. Sifting loosens the flour, removes lumps and impurities, and aerates it. Melt the butter and let it cool.
Step 5
In a separate bowl, crack in the egg and add 1 egg yolk. Add the remaining sugar and salt, then whisk lightly until smooth.
Step 6
To the ready, well-risen sponge, add the remaining warm milk. Stir, then pour in the egg mixture. If your bowl is too small, transfer everything to a larger one. It’s convenient to start the sponge right in the bowl you’ll knead the dough in.
Step 7
Add the sifted flour in two stages.
Step 8
Don’t add all the flour at once - set aside 30-40 g (about 1-1½ oz); you may need it at the end of kneading.
Step 9
Knead the dough - first with a spatula, then by hand. Once all the flour is moistened and the dough is uniform, add the melted butter in two additions. The dough will be sticky and stretchy. Knead for about 15 minutes, adding a little of the reserved flour if needed. In the end, it will gather into a ball and become smoother and more elastic.
Step 10
I kneaded in the bowl first, then continued on the table after adding all the flour. I didn’t add extra flour; instead, I lightly greased the countertop and my hands with vegetable oil. Well-kneaded dough doesn’t stick to your hands; it’s smooth, tender, and airy. Round the dough by tucking the edges underneath, then place it into a large clean bowl. Lightly grease the inside with neutral (odorless) vegetable oil.
Step 11
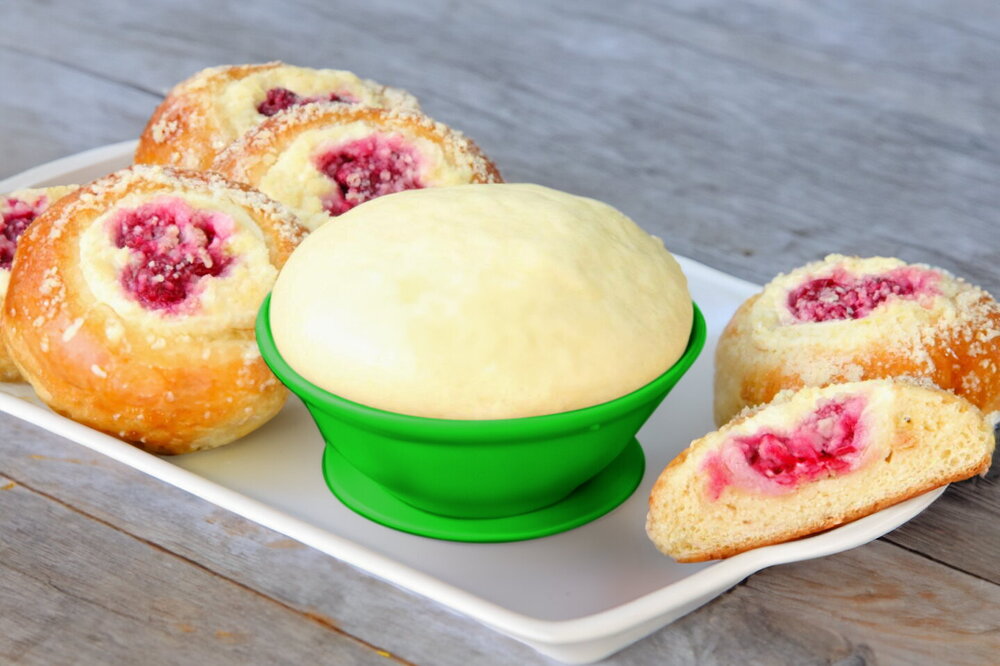
Cover the bowl with plastic wrap and leave to ferment for 1-1½ hours in a warm, draft-free place. After an hour, my dough had risen to almost 2.5 times its original volume. I place it in a slightly warmed, then turned-off oven at no more than 38-40°C (100-104°F). The finished dough weighed 790 g (about 1 lb 12 oz) - enough for 9 vatrushki, about 87 g (3.1 oz) each.
Step 12
Here are vatrushki made from this dough. How to make them? Punch down the finished dough and divide into 9 balls. Place them on a parchment-lined baking sheet, cover with plastic wrap, and proof for 30 minutes. Then make an indentation by pressing with the greased bottom of a glass. Brush the edges with egg + 1 tbsp milk. Add the filling and sprinkle with streusel. Bake in a preheated oven at 190°C (375°F) for about 25 minutes, until golden. Cool on a rack and taste!
Author note
Share the recipe
