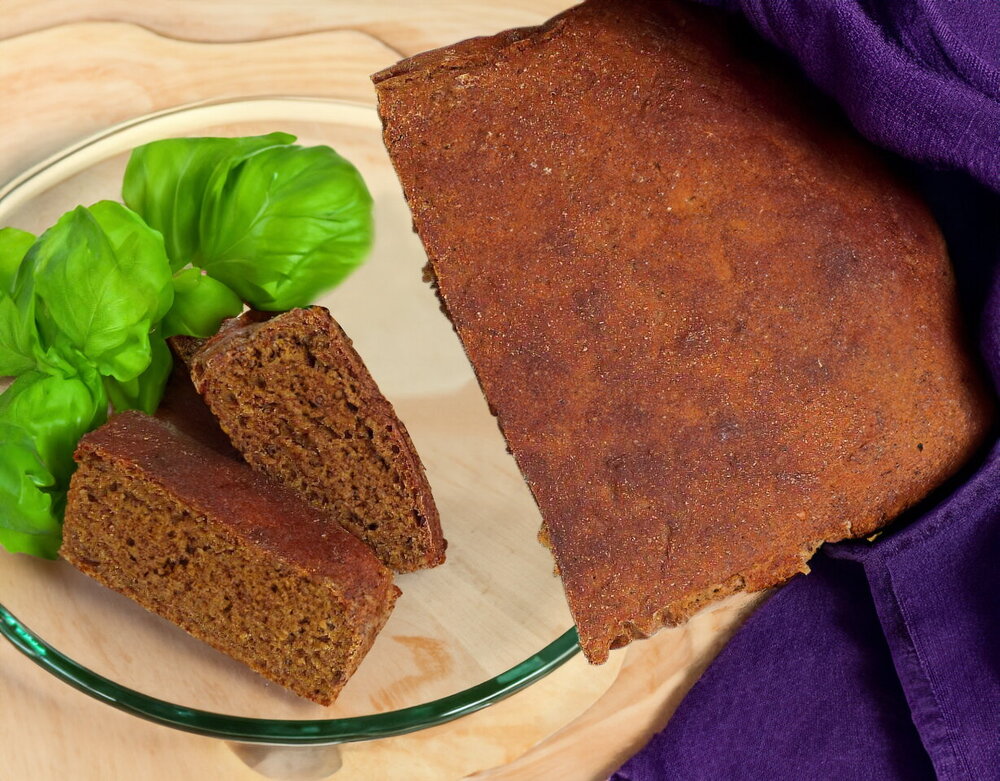
Easy No-Knead Sourdough Rye Bread (Oven)
No fuss - even a beginner can do it! Baking an easy no-knead sourdough rye bread in the oven is simple: stir with a spoon and wait a bit. No long kneading!
Updated : 13 February, 2026
Easy
More than 1 hour.
Ingredients
Starter

50 grams
Ready-made sourdough starter

200 milliliters
Water

200 grams
Rye flour
Dough
550 grams
Rye flour

150 grams
Wheat flour

100 grams
Whole-wheat flour
800 milliliters
Water

2 tablespoon
Malt

1 tablespoon
Salt

0.5 grams
Sugar substitute
Table
Table of volume measurements:
- teaspoon - 5 ml
- dessert spoon - 10 ml
- tablespoon - 20 ml
- glass - 200 ml
Preparation
Step 1
How to bake easy no-knead rye bread: In the evening, prepare the preferment. In a suitable container (it will rise 2-3 times), combine the rye sourdough starter, cold water, and flour. Mix well with a spoon, lightly cover with a napkin or lid, and leave overnight to rise.
Step 2
In the morning, measure the flours in a separate bowl: I never sift rye or whole-wheat flour, but I do sift wheat flour (mine is first-grade/standard bread flour) through a sieve. In a separate bowl, brew the rye malt: pour in enough boiling water to turn it into a thick, sticky porridge-like paste (this boiling water is additional). Let it cool for now.
Step 3
Pour cold water into a large bowl. In this recipe, flour and water are used in a 1:1 ratio. Add salt and sweetener (12-15 drops) or 1-2 teaspoons sugar. Stir.
Step 4
Add the brewed malt to the water and mix well until smooth.
Step 5
Add the sourdough starter and stir again.
Step 6
Add the flour to the liquid, stirring with a spoon. You may need a little less or a little more flour - judge by the consistency. The beauty of this recipe is that you don’t need to knead by hand. The dough is so sticky that kneading is basically impossible; all you need is to mix thoroughly with a spoon.
Step 7
Take a suitable bread-baking pan (I used two glazed ceramic pans), line it with parchment paper so it’s easier to remove the bread after baking, and transfer the dough in, leveling it with a spoon.
Step 8
The dough should fill no more than 1/3 of the pan, since it will rise during proofing.
Step 9
For this amount of dough, I needed two pans. They don’t have to be specialized, but they should be suitable for baking bread (important criteria: good heat conductivity and the ability to withstand high temperatures). For this reason, silicone pans are not suitable. Cover the dough in the pans with lids if you have them and they fit tightly; if not, cover the top with plastic wrap and leave to proof for about 3 hours.
Step 10
My dough proofed for 3.5 hours. During that time it increased 2.5-3 times. Be careful: if sourdough rye dough overproofs, it can collapse, and the bread will turn out flat and less tasty. Tip: you can ignore it for the first 2 hours, but after that check it at least every 30 minutes until it has risen enough.
Step 11
Set the oven to top/bottom heat, 240°C (464°F), and preheat for 15 minutes. Then put the pans in the oven and bake at 240°C (464°F) for 10 minutes, then 40-45 minutes at 200°C (392°F). If you have two pans, swap them after 20 minutes for more even baking. The time is approximate - adjust to your oven.
Step 12
Carefully remove the baked bread from the pan, peel off the parchment, and let it rest wrapped in a towel (you can place a silicone mat on top to create a steamy effect). The crust will be crisp either way, but this simple step will make it more tender. Enjoy!
Author note
Share the recipe
)