Coconut Dacquoise Sponge Cake with Berries
Incredibly delicious, beautiful, original and melt-in-your-mouth! Coconut dacquoise sponge with berries will decorate any festive table. It’s especially good for New Year’s or women’s celebrations. This airy, delicate dessert is true food of the gods, and it’s not as hard to make as it might seem.
Updated : 16 December, 2025
Easy
About 1 hour.
Ingredients
Sponge cake

3
Egg whites

35 grams
Sugar

60 grams
Almond flour

40 grams
Coconut flakes

90 grams
Powdered sugar
Cream
5 tablespoon
Sugar

200 grams
Heavy cream

200 grams
Cream cheese

200 grams
Berries
Table
Table of volume measurements:
- teaspoon - 5 ml
- dessert spoon - 10 ml
- tablespoon - 20 ml
- glass - 200 ml
Preparation
Step 1
How to make coconut dacquoise sponge with berries? First, prepare the ingredients for the sponge layers. You can make almond flour yourself by lightly toasting the nuts in a dry pan or in the oven and then grinding them in a coffee grinder. Wash the eggs and dry them with paper towels. Take them out of the refrigerator right before whipping.
Step 2
Before making the batter, take a sheet of baking paper and draw circles 16-17 cm (about 6½ in) in diameter. This amount of batter makes three layers, so draw three circles of the same size. You can trim off any excess paper, leaving 4-5 cm (1½-2 in) around the circles, or leave the sheet as it is - the main thing is that it fits on the baking tray.
Step 3
Start preparing the batter. Carefully separate the chilled egg whites from the yolks. The yolks aren’t needed in this recipe, so you can set them aside to make something else, such as homemade mayonnaise, custard, ice cream, or anything you like. Pour the egg whites into a deep bowl and beat with a mixer until a fluffy foam forms.
Step 4
Continuing to beat the whites, gradually add the fine sugar (35 g) or powdered sugar.
Step 5
Beat the whites until stiff peaks form and the sugar has completely dissolved.
Step 6
In a separate bowl, sift 90 g of powdered sugar together with the almond flour.
Step 7
Add the shredded coconut to the almond flour.
Step 8
Mix everything thoroughly. By the way, if your shredded coconut is quite coarse, you can grind it in a coffee grinder until fine crumbs form (that’s what I did).
Step 9
Add the previously mixed almond flour, shredded coconut and powdered sugar to the whipped egg whites.
Step 10
Gently fold the batter with a spatula until completely homogeneous.
Step 11
Fit a piping bag with a round tip about 10 mm (⅜ in) in diameter and fill it with the batter.
Step 12
Starting from the center of each drawn circle, pipe three disks onto the baking tray in a spiral motion to form even rounds.
Step 13
Dust the tops of the layers with a little powdered sugar and leave them for 5-7 minutes.
Step 14
After 5-7 minutes, dust the layers with powdered sugar again and let them sit for another 5-7 minutes. During this time, preheat the oven to about 150 °C (302 °F).
Step 15
Place the tray with the dacquoise layers into the preheated oven and bake for 25-35 minutes. The layers should become lightly golden on top. Adjust the time according to your oven.
Step 16
Let the sponge layers cool slightly on the tray, then transfer them to a wire rack and leave until completely cooled. The coconut dacquoise sponge is ready and can be used for any dessert you like.
Step 17
As one option, I suggest making a very tasty, light summer cake from these layers. For the cream, take cream cheese or soft, mild cottage cheese (if using cottage cheese, make sure it isn’t bitter or overly sour). Use heavy cream with at least 33% fat. The berries can be any kind you like. By the way, you can also make the cream using only cream, without cottage cheese or cream cheese, but I prefer the combination.
Step 18
Whip the chilled heavy cream with a mixer until stiff.
Step 19
Beat the cream cheese or cottage cheese with powdered sugar or fine sugar. If you’re using cottage cheese, press it through a sieve first so the cream is smoother.
Step 20
Combine the cheese mixture with the whipped cream, gently folding with a spatula. You should get a very light, moderately sweet cream (adjust the amount of sugar to taste, but remember that the layers are sweet on their own, so don’t overdo it or the cake will become too sugary).
Step 21
Once the cream is ready and the layers are completely cool, you can assemble the cake. Place one layer on a flat plate and spread an even layer of cream on top (it’s most convenient to do this with a piping bag fitted with a round tip). Place the second layer on top and spread it with cream as well.
Step 22
I recommend lightly decorating the top layer. To do this, pipe generous mounds of cream in a circle, leaving about 1 cm (½ in) from the edge. Spread an even layer of cream in the center.
Step 23
Then, using the back of a teaspoon, make small indentations in the cream, moving from the outer edge toward the center. This way you’ll get a kind of flower pattern. Place the cake in the refrigerator for 30-40 minutes. You can leave it longer so the layers soak and the cream sets well.
Step 24
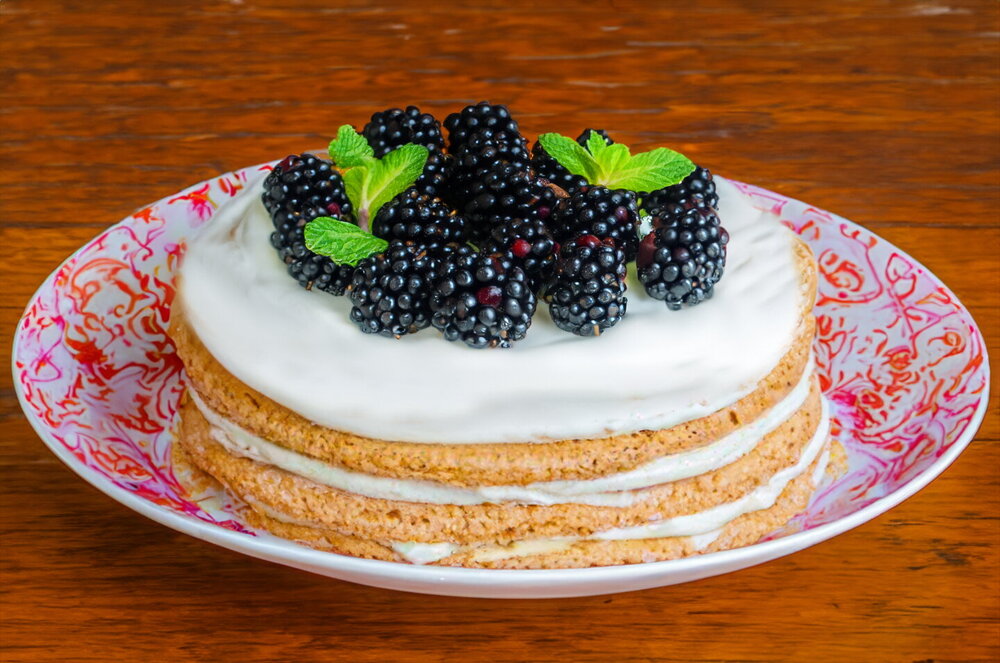
Just before serving, decorate the cake with fresh berries and mint leaves.
Step 25
Your beautiful festive cake with coconut dacquoise layers is ready.
Step 26
Enjoy!
Author note
Share the recipe
