Mastering Shrimp Prep: How to Clean Shrimp Like a Pro
Shrimp is one of the most versatile and popular seafood ingredients around the world. Whether you’re making shrimp tacos, pasta, stir-fry, or grilled skewers, knowing how to clean shrimp properly is a skill every home cook should master.
Many people shy away from fresh or raw shrimp, opting instead for pre-cooked or peeled varieties. But cleaning shrimp at home is easier than you think, and doing it yourself ensures better texture, flavor, and cleanliness.
In this article, we’ll walk you through the entire process of how to clean shrimp—peeling, deveining, and prepping—so you can cook confidently and deliciously every time.
Why Clean Shrimp Yourself?
While pre-cleaned shrimp is convenient, it often costs more and can be treated with preservatives. Here are a few benefits of cleaning shrimp at home:
- Better freshness
- More affordable
- Customizable prep (keep shells for broth or remove tails for pasta)
- Cleaner product (no additives or missed veins)
What You’ll Need
Before you begin, gather your tools:
-
A small sharp paring knife or deveining tool
-
Bowl of cold water
-
Cutting board
-
Paper towels
-
Trash bowl (for shells and veins)
Optional: gloves for handling raw seafood, especially if you're sensitive to texture.
Step-by-Step Guide: How to Clean Shrimp
Step 1: Thaw (If Frozen)
If your shrimp is frozen, place it in a bowl of cold water for about 15–20 minutes until thawed. Avoid warm or hot water, as this can partially cook the shrimp.
Step 2: Rinse
Rinse shrimp under cold running water to remove any ice crystals, sand, or surface debris.
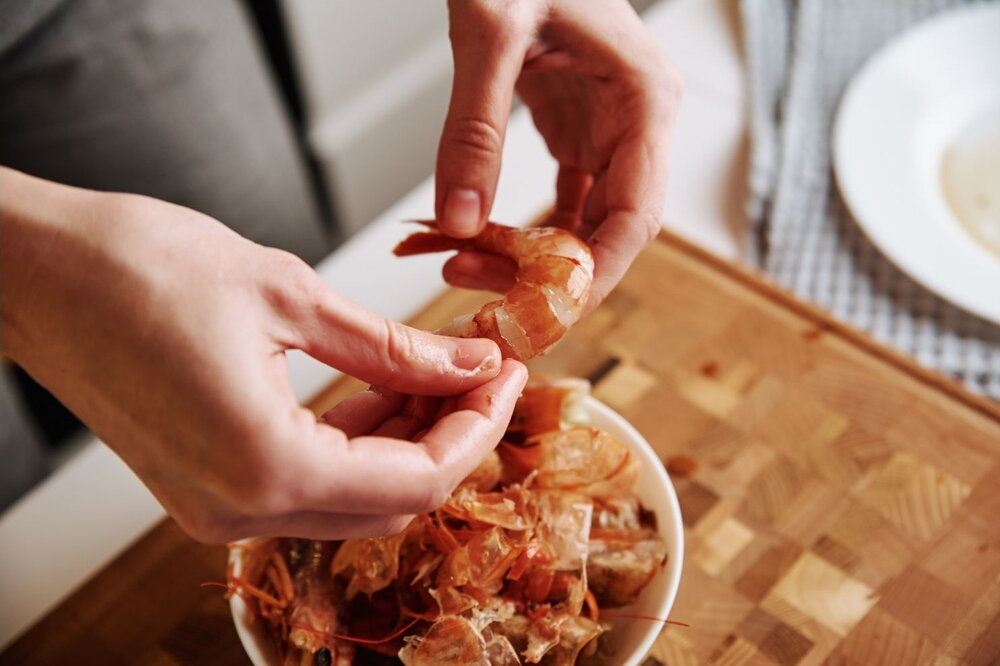
Step 3: Remove the Shell
Hold the shrimp firmly. Start peeling from the head (if attached), and work your way down the body.
-
Leave the tail on for shrimp cocktails or grilling, if desired.
-
Remove the tail for pastas or stir-fries where it’s meant to be fully eaten.
Pro tip: Save the shells to make a rich seafood broth!
Step 4: Devein
This is the most crucial part of cleaning shrimp. The “vein” is actually the shrimp’s digestive tract and can contain sand or grit.
Here’s how to devein shrimp:
-
Use a paring knife to make a shallow slit along the back of the shrimp.
-
Look for the dark vein running just under the surface.
-
Gently lift it out with the tip of your knife or rinse under running water to remove it.
Not all shrimp have a visible vein, but it’s good practice to check.
Step 5: Rinse Again and Dry
After deveining, rinse the shrimp one final time and pat them dry with paper towels. Now your shrimp is ready to cook, season, or marinate!
Pro Tips for Cleaning Shrimp
-
Buy easy-peel shrimp if you’re new to cleaning—these have pre-cut shells for faster peeling.
-
Use a toothpick to devein if you don’t have a knife. Insert it sideways under the vein and lift.
-
Cook immediately after cleaning, or store shrimp in an airtight container on ice in the fridge for up to 24 hours.
-
Freeze cleaned shrimp if not cooking the same day. Pat dry and place in freezer-safe bags.
Recipe Ideas for Your Cleaned Shrimp
-
Garlic butter shrimp
-
Shrimp scampi pasta
-
Shrimp and grits
-
Shrimp tacos with lime crema
-
Spicy shrimp stir-fry
Once you’ve cleaned your shrimp, the cooking possibilities are endless!
Final Thoughts
Cleaning shrimp might seem intimidating at first, but once you learn the steps, it becomes second nature. It’s a quick task that pays off with fresher flavor, better texture, and more control in the kitchen.
Whether you’re cooking for a casual weeknight dinner or preparing seafood for guests, mastering this basic skill will level up your home cooking game. So next time you're at the seafood counter, grab raw shrimp with confidence—you’ve got this.